
Directory Manager
Introduction
Starting in Joget DX 9, support for Identity Providers and Multi Factor Authentication is available. These additions allow administrators the capability to provide an extra layer of protection on top of a username and password combination for application logins. Previously, this was only attainable through plugins.
Prerequisites
IdP and MFA is only supported in Joget Enterprise Edition.
How does it work?
Identity Provider (IdP)
When the Identity Provider feature is enabled, Joget users are able to manually link the configured IdPs to their Joget accounts.
There are a few concepts to understand here:
- Joget User – A user that already exists in Joget, such as the “admin” account.
- IdP User – A user that exists on the IdP’s user list. For example, since Google supports OpenID Connect, Google is considered an IdP. An “IdP User” in Google would be your Google account.
- Linking an IdP – Involves associating some unique data about an IdP User from an IdP to a Joget account. This effectively ties the IdP and the IdP User to the Joget account. Allows the Joget account to be signed in with a specific IdP User.
The matrix below illustrates scenarios with a combination of settings that are standard in the IdP Framework (Automatic Linking and User Provisioning):
|
Automatic Linking disabled |
Automatic Linking enabled |
|
|---|---|---|
|
User Provisioning disabled |
|
|
|
User Provisioning enabled |
|
|
Multi-factor Authentication (MFA)
The multi-factor authentication only works with local Joget account logins and does not work with identity provider logins. This is because it is the burden of the identity provider to provide sufficient identification and authentication for the users in its database.
The MFA pop-up screen will show up when the user submits the login form and only if the user has registered a valid MFA method. A valid MFA method means that the MFA plugin is:
-
Installed and configured in the system, and
-
The user has registered the MFA method in their account
The MFA pop-up screen differs depending on the number of registered MFA methods the user has:
-
If the user has more than one valid MFA registered, the pop-up will first show a list of the user’s registered MFA methods. The user will be able to choose their desired method, and the MFA method’s login page will be shown.
-
If the user has only one valid MFA method registered, then that MFA method’s login page will be directly shown.
-
If the user does not have any valid MFA method registered, then the user will be immediately logged in.
Admin Console
Introduction
The admin console can be accessed by administrators of the system. It is located in:
Admin Bar > Settings > Directory Manager Settings.
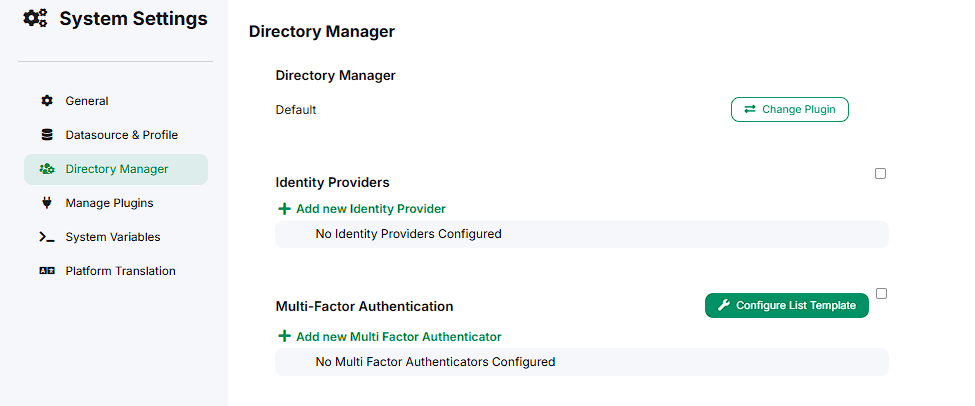
The admin console allows management and configuration of the identity provider (IdP) and multi-factor authentication (MFA) plugins installed on the system. With the admin console, administrators can add, remove, and edit IdP and MFA plugin configurations; enable/disable IdP and MFA features system-wide; and configure a custom MFA list template that is displayed during login.
Managing Identity Provider and Multi-Factor Authentication Configurations
Adding a Plugin Configuration
-
Make sure the identity provider plugin you wish to configure is installed in the system.
-
Click on the + Add new Identity Provider or + Add new Multi Factor Authenticator button.
-
Choose the plugin from the pop-up list.
-
Configure the plugin accordingly.
-
Click the Submit button.
-
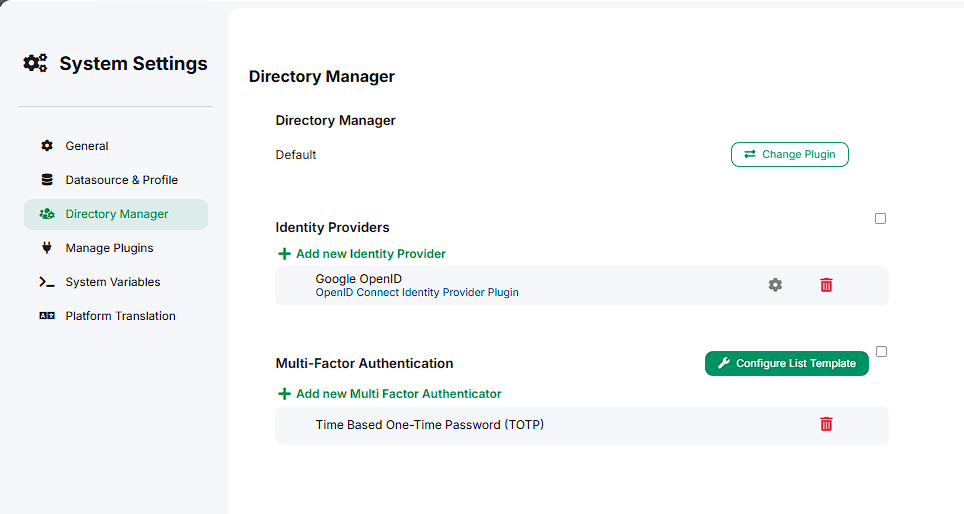
The pop-up closes, and the plugin is now configured and shown on the page.
Editing a Plugin Configuration
-
A pop-up should appear with the plugin’s configuration.
-
Edit the desired fields.
-
Click the Submit button.
-
The pop-up closes, and the new configuration is saved.
Removing a Plugin Configuration
-
A confirmation dialog will appear to confirm your action.
-
Clicking OK removes the configuration, and clicking Cancel retains the configuration.
-
The page is updated with the configuration removed.
Enable/Disable Feature System-Wide
The Identity Provider and Multi-Factor Authentication features can be independently enabled/disabled system-wide. This allows system administrators to control whether to allow all users in the system to use the feature. To toggle the setting, follow the instructions below:
-
Click the checkbox unchecked
 or checked
 next to the title of each section.
 -
A confirmation dialog will appear to confirm your action.
-
Clicking OK will toggle the feature, and clicking Cancel will not toggle the feature.
-
The page will update with the updated setting.
Configuring Multi-Factor Authentication List Template (Advanced)
The UI of the list of MFA methods shown can be customised by supplying an Apache FreeMarker template.
The table below contains a list of variables that can be accessed in the FreeMarker template:
|
Variable Name |
Type |
Description |
|
pluginUrlMap |
Map<MfaPlugin, String> |
Maps the MfaPlugin object to the URL of the page of the MFA method. |
|
pageTitle |
String |
The title of the page. |
|
request |
HttpServletRequest |
The request of the page. |
To apply a template:
-
Click the Configure List Template button in the Multi-Factor Authentication section.
-
A pop-up will appear with a text box.
-
Paste the Apache FreeMarker template in the text box.
-
Click on the Submit button. The list template is now updated.